どうもDB関連のコマンドを覚えられないのでメモ
- テーブルを消去し初期化する(foreign keyがある時)
SET FOREIGN_KEY_CHECKS = 0;
TRUNCATE TABLE テーブル名;
SET FOREIGN_KEY_CHECKS = 1;
注:auto increment がある事、IDは1からになる - ある範囲のIDを消去(foreign keyがある時)
SET FOREIGN_KEY_CHECKS=0;
DELETE FROM テーブル名 WHERE id BETWEEN 始めのid AND 終わりのid;
SET FOREIGN_KEY_CHECKS=1;
- 特定のIDからスタートする
ALTER TABLE テーブル名 AUTO_INCREMENT=スタートするid - CSVファイルからインポートする(idのカラムが無い時)
LOAD DATA INFILE ‘/Save/TrHotels_09 2026.csv’ into table tr_hotels fields terminated by ‘,’ enclosed by ‘”‘ lines terminated by ‘\n’ ignore 1 lines (flight,arr,dep,htl_name,room_type,meals,nts,remarks,rooming,unit_price,usd_ttl,
jpy_ttl,net,htl_code,tour_id,created_at,updated_at,cancelled,cancelled_date,
conf_no,offer_code); - 最大のID番号を調べる
SELECT MAX(id) FROM テーブル名
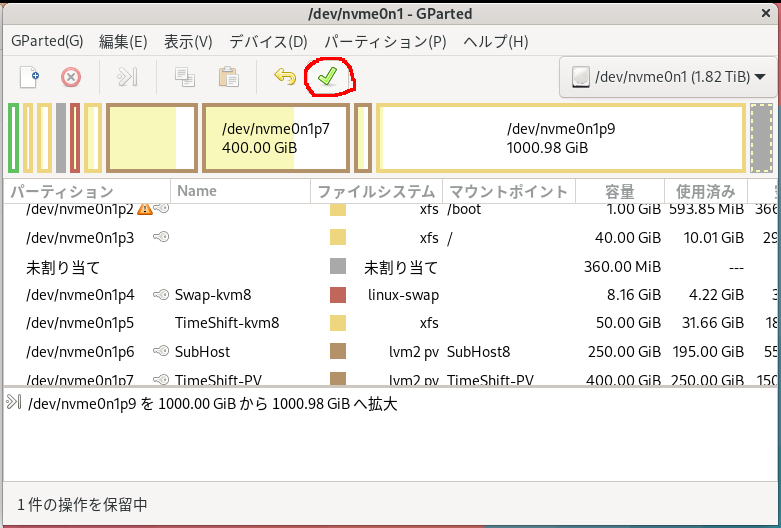
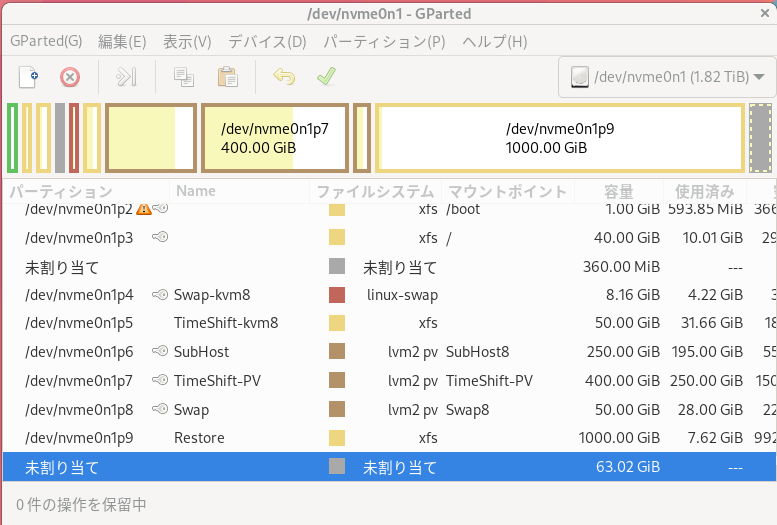 ここで変更したい領域を選び、パーティション → リサイズ/移動をクリックすると
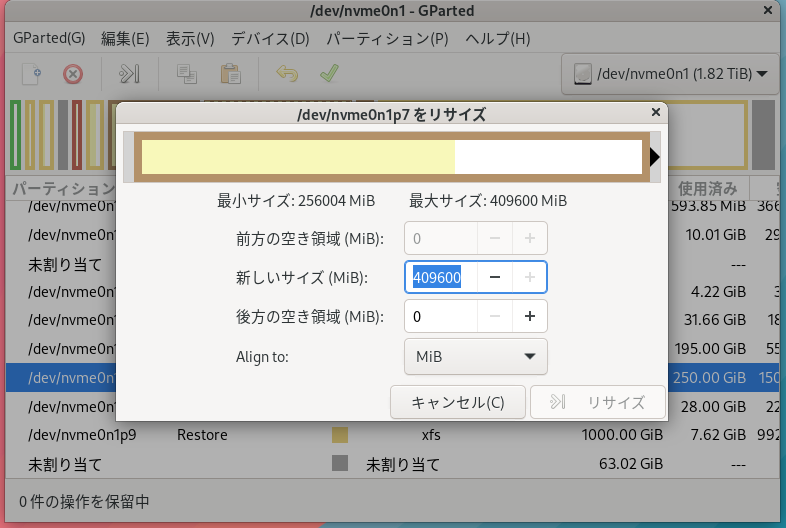 上の画面が開くので、前方の空き領域、新しいサイズ、後方の空き領域などを調整し、リサイズをクリック、この様にして変更したい領域を全部編集し終わったら、